5.6 开发编辑器组件
编辑备忘录内容需要一个富文本编辑器,我们需要借助开源的第三方包来实现。经过对比,一个名为 wangEditor 的富文本编辑器表现比较优秀,且对 Vue3 支持友好,我们就选这个。
5.6.1 编写编辑器组件
下面按照步骤安装和使用该编辑器,并且封装一个名为 CusEditor.vue 的公共编辑器组件。
(1)执行如下命令安装 wangEditor:
$ yarn add @wangeditor/editor
$ yarn add @wangeditor/editor-for-vue@next
(2)创建 components/CusEditor.vue 组件,并编写如下代码:
<template>
  <div class="customcomp-editor">
    <toolbar :editor="editorRef" />
    <slot /> // 插槽
    <editor
      mode="simple"
      v-model="valueHtml"
      @onCreated="(ref) => (editorRef = ref)"
    />
  </div>
</template>

<script setup lang="ts">
import { ref, shallowRef } from "vue";
import { Editor, Toolbar } from "@wangeditor/editor-for-vue";
const valueHtml = ref("<p>hello</p>");
const editorRef = shallowRef();
</script>

<style lang="less">
@import "@wangeditor/editor/dist/css/style.css";
.customcomp-editor {
  width: 100%;
}
</style>
上面的代码先引入 Editor 组件和 Toolbar 组件,分别表示编辑器和工具栏;再引入编辑器的 CSS 样式文件,并双向绑定一个状态。这样一个简单的编辑器就可以使用了。
提示:在模板中的工具栏组件和编辑器组件之间有一个默认插槽,该插槽的作用是将标题文本框插入此处。
(3)实现自定义 v-model 指令。
<editor ... v-model="valueHtml"/>
// 修改为如下形式
<editor ... :modelValue="props.modelValue" @onChange="onChange"/>
修改之后,在 script 部分定义 props 和 onChange:
const props = defineProps<{
  modelValue: string;
}>();
const emits = defineEmits<{
  (e: "update:modelValue", html: string): void;	// 自定义事件
}>();
const onChange = (editor)=> {
  // 触发自定义事件
  emits("update:modelValue", editor.getHtml());
}
经过上面的完善,这个编辑器组件在外部使用时即可用 v-model 指令绑定数据,使用方式如下:
<cus-editor v-model="valueHtml" />(4)自定义编辑器工具栏。
默认的编辑器工具的栏选项非常多,但很多是不常用到的,因此可以精简一下。在 Toolbar 组件的 defaultConfig 属性下可以自定义工具栏,代码如下:
<toolbar :defaultConfig="config"/>
// script
const config = {
  toolbarKeys: [
    "undo", "redo", "|", "bold","italic", "through","color","bgColor","|",
    "fontSize", {
      key: "group-justify",
      menuKeys: [
        "justifyLeft",
        "justifyRight",
        "justifyCenter",
        "justifyJustify",
      ],
      title: "对齐",
    },
    "insertImage", "|",
    "clearStyle",
  ],
};
至此,编辑器组件开发完成,关于更多细节请查阅本章的配套代码。
5.6.2 实现备忘录编辑
上面实现了编辑器组件,接下来使用该组件编辑选中的备忘录内容。
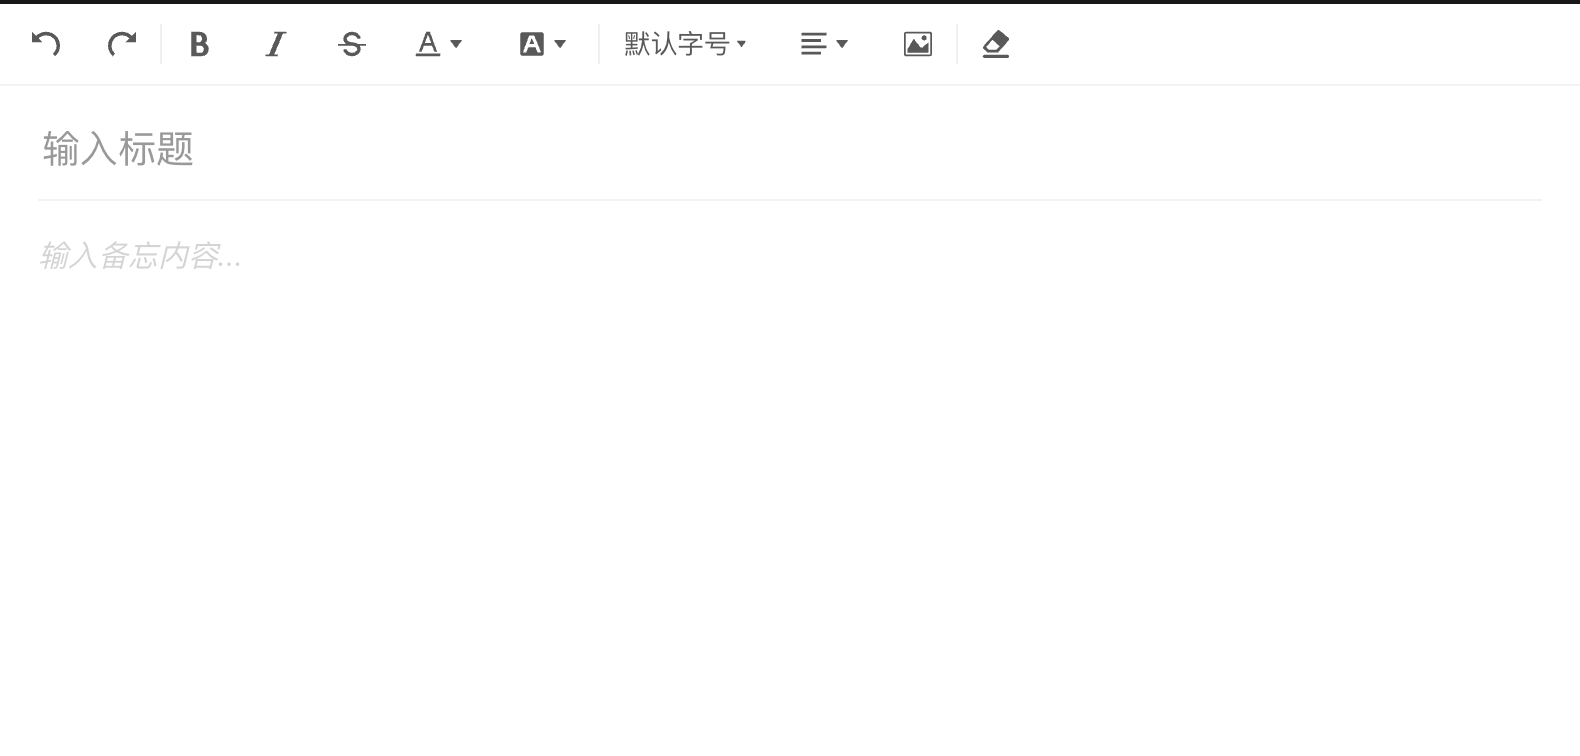
(1)引入公共编辑器组件 CusEditor,并定义一个标题文本框,之后将其作为默认插槽插入编辑器内部:
<template>
  ...
  <div class="detail">
    <cus-editor v-model="content">
      <input placeholder="输入标题" class="memo-title" v-model="title" />
    </cus-editor>
  </div>
</template>
<script setup lang="ts">
import { ref } from "vue";
import CusEditor from "@/components/CusEditor.vue";
const title = ref("");
const content = ref("");
</script>
上面的代码定义了 title 状态和 content 状态,分别表示备忘录的标题和内容。在默认情况下,这两个状态是空的,因此还要获取当前选中的备忘录并为其赋值。
(2)在首页 Store 中定义一个名为 activeMemo 的 Getter,用来动态获取当前选中的单条备忘录:
getters: {
  activeMemo(state): MemoType {
    return this.activeMemos.find((r) => r.memo_id == state.active_memoid);
  },  // 当前的单条备忘录
},
(3)在 JavaScript 代码中监听 active_memoid 状态并修改备忘录的标题和内容,这里需要使用计算属性和 watch 监听:
import { watch, nextTick } from "vue";
import { indexStore } from "@/stores";
const store = indexStore();

const updateCtx = () => {
  if (store.activeMemo) {
    // 避免数据修改页面不更新
    nextTick(() => {
      title.value = store.activeMemo.title;
      content.value = store.activeMemo.content;
    });
  }
};
watch(
  () => store.active_memoid,
  (val) => {
    if (val) {
      updateCtx();
    } else {
      title.value = content.value = "";
    }
  }
);
至此,实现了编辑标题和富文本内容时的自动保存。
请尝试编写一段文字并刷新浏览器,发现文本内容依然存在;或者直接查看控制台的 localStorage,发现本地数据已经更新。
最终的编辑器的页面效果如图所示。