13.7 开发文章编辑发布页面
文章编辑发布页对作者来说是最重要的页面,因为要在该页面发布和编辑文章。该页面会基于公共编辑器组件实现,并添加文章发布的参数选择、自动保存草稿箱等功能。
(1)创建文件 views/article/operate.vue 表示文章发布页,并添加一条路由配置如下:
js
{
  path: '/operate/:tag',
  name: 'operate',
  component: () => import('@/views/article/operate.vue'),
}
(2)添加页面模版代码,支持输入文章标题和文章内容,如下:
html
<div className="article-editor-page">
  <div className="top-bar fx-b">
    <input
      className="title"
      v-model="form.title"
      @input="ctxChange('title')"
      placeholder="请输入文章标题"
    />
    <div className="right-box fx">
      <span class="tip">文章将自动保存至草稿箱</span>
      <el-button class="actmo">草稿箱</el-button>
      <div class="user-wrap">
        <el-tooltip effect="dark" content="返回用户中心">
          <el-avatar :size="32">
            <img src="@/assets/avatar.png" />
          </el-avatar>
        </el-tooltip>
      </div>
    </div>
  </div>
  <div className="main">
    <CusEditor
      v-model="form.content"
      @update:modelValue="ctxChange('content')"
    />
  </div>
</div>
(3)编写组件 JS 代码,导入编辑器组件,并定义存储数据的 from 对象。组件初始化后要从 URL 中获取参数,判断当前页面是新建文章还是编辑文章,编辑时要获取文章详情数据。如下:
vue
<script setup lang="ts">
import { onMounted, ref } from "vue";
import CusEditor from "@/components/cus-editior/index.vue";
import { articleStore, userStore } from "@/stores";
import { useRoute, useRouter } from "vue-router";
const artstore = articleStore();
const route = useRoute();
const form = ref<Partial<ArticleType>>({
title: "",
content: "",
category: "all",
intro: "",
});
const mode = ref("create");
onMounted(() => {
let tag = route.params.tag as string;
mode.value = tag;
artstore.getCategory();
if (tag != "create") {
artstore.getArtDetail(tag, (data) => {
form.value = data;
});
}
});
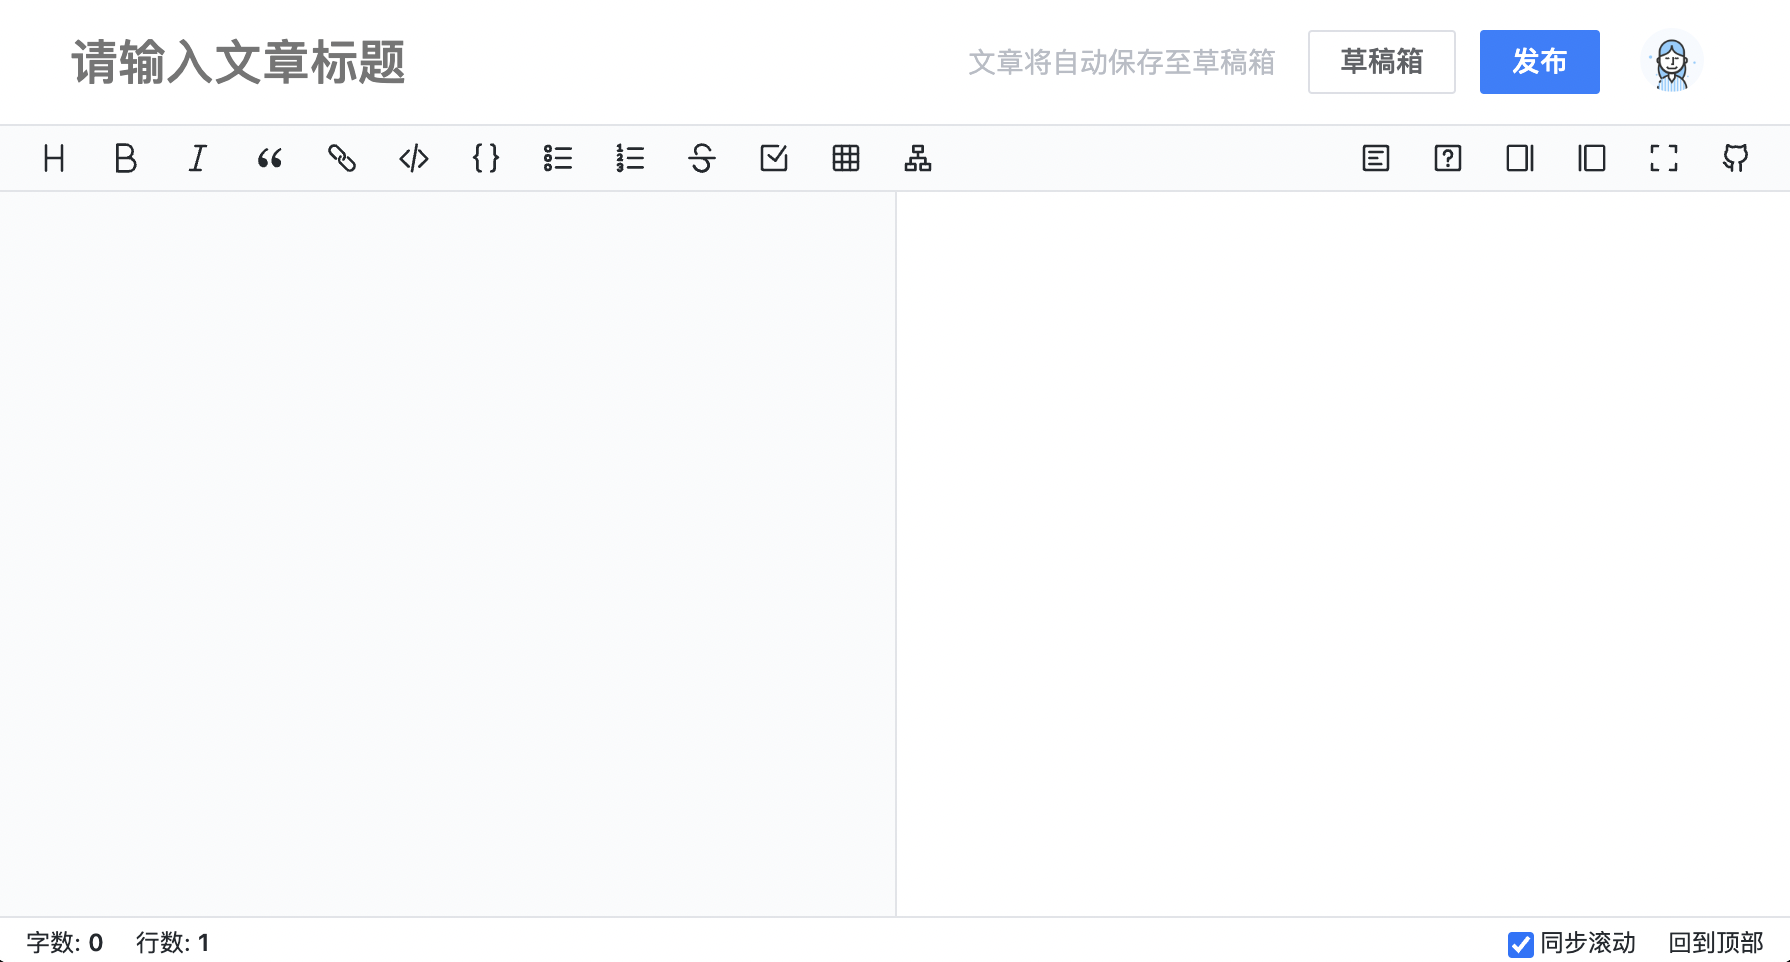
</script>(3)添加页面的样式代码,主要定义顶部标题输入框和操作拦的样式,代码如下:
less
.article-editor-page {
  position: fixed;
  left: 0;
  right: 0;
  top: 0;
  bottom: 0;
  .top-bar {
    background: #fff;
    padding: 0 27px;
    .right-box {
      margin-right: 20px;
      .tip {
        color: var(--font-color3);
        font-size: 14px;
      }
      .user-wrap {
        margin-left: 20px;
        cursor: pointer;
      }
    }
  }
  .title {
    height: 60px;
    color: #000;
    font-weight: 500;
    font-size: 24px;
    &:focus {
      box-shadow: none !important;
    }
  }
  .main {
    background: #fff;
    .bytemd {
      height: calc(100vh - 60px);
    }
  }
}
完成以上的 3 个步骤,就可以看到页面如图所示:
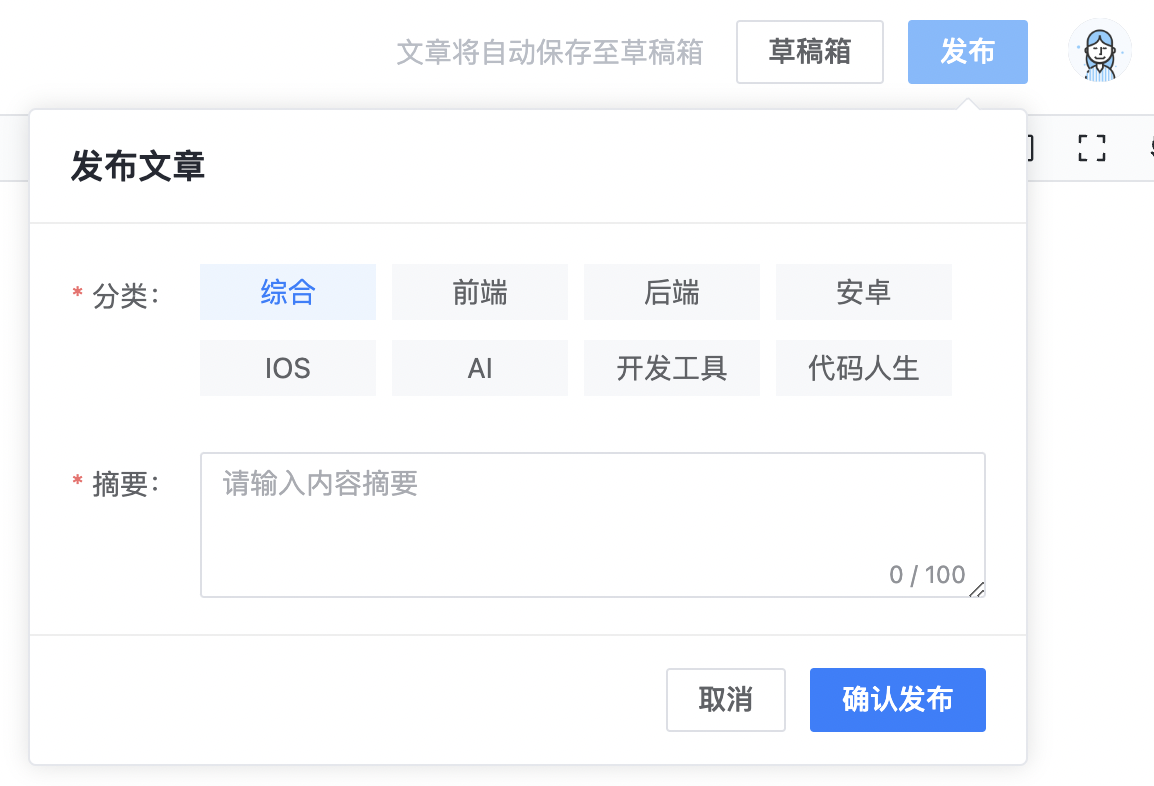
(4)添加一个发布按钮,点击后弹出发布或修改文章需要完善的选项,关键模版代码如下:
html
<el-popover
  placement="bottom-end"
  :width="500"
  trigger="click"
  transition="none"
  popper-class="art-publish-popover"
>
  <template #reference>
    <el-button class="actmo" type="primary">
      {{ mode == 'create' ? '发布' : '修改' }}
    </el-button>
  </template>
  <div class="p-title">{{ mode == 'create' ? '发布' : '修改' }}文章</div>
  <el-form label-width="85px">
    <el-form-item required label="分类:">
      <div
        :class="['cate-item', { active: item.key == form.category }]"
        v-for="item in artstore.categories"
        @click="form.category = item.key"
      >
        {{ item.label }}
      </div>
    </el-form-item>
    <el-form-item required label="摘要:">
      <el-input
        v-model="form.intro"
        type="textarea"
        placeholder="请输入内容摘要"
        maxlength="100"
        show-word-limit
        :rows="3"
      />
    </el-form-item>
  </el-form>
  <div class="p-footer">
    <el-button class="actmo" @click="popover.hide()">取消</el-button>
    <el-button
      class="actmo"
      :loading="loading"
      type="primary"
      @click="toPublish"
    >
      {{ mode == 'create' ? '确认发布' : '确认修改' }}
    </el-button>
  </div>
</el-popover>
(5)在文章 Store 中添加创建文章、修改文章、发布文章三个方法,分别调用对应的接口,代码如下:
js
// 创建文章
async createArt(data: Partial<ArticleType>, fun: (data: any) => void) {
  try {
    let res: any = await request.post('/arts/create', data)
    fun(res)
  } catch (error) {
    console.log(error)
  }
},
// 修改文章
async updateArt(id: string, data: Partial<ArticleType>, fun: () => void) {
  try {
    let res: any = await request.put('/arts/update/' + id, data)
    fun()
  } catch (error) {
    console.log(error)
  }
},
// 发布文章
async publishArt(id: string, fun: () => void) {
  try {
    await request.post('/arts/publish/' + id)
    fun()
  } catch (error) {
    console.log(error)
  }
},
(6)在 JS 代码中添加 toPublish() 方法,并根据当前页面的模式判断执行发布文章还是修改文章的逻辑,代码如下:
js
const loading = ref(false);
const toPublish = () => {
  let { title, content, category, intro } = form.value;
  if (!title) {
    return ElMessage.error("标题不能为空");
  }
  if (!content) {
    return ElMessage.error("文章内容不能为空");
  }
  if (!category) {
    return ElMessage.error("文章分类必选");
  }
  if (!intro) {
    return ElMessage.error("文章摘要必填");
  }
  loading.value = true;
  if (form.value.status && form.value.status == 1) {
    artstore.updateArt(mode.value, form.value, () => {
      loading.value = false;
      location.href = "/article/" + mode.value;
    });
  } else {
    artstore.publishArt(mode.value, () => {
      loading.value = false;
      location.href = "/article/" + mode.value;
    });
  }
};
(7)在正式发布文章之前,需要监听用户编辑并自动将文章保存在草稿箱,防止文章丢失。
自动保存文章功能需要监听文本修改事件,但要控制自动保存的触发频率,因此需要一个防抖函数。在 utils/index.ts 中添加一个防抖函数,代码如下:
js
export const debounce = (fn: Function, delay = 1600) => {
  let timer: number | null = null;
  return (...args: any[]) => {
    if (timer) {
      clearTimeout(timer);
    }
    timer = setTimeout(function () {
      fn(...args);
    }, delay);
  };
};
在组件 JS 代码中导入该函数,并实现自动保存的 ctxChange() 方法:
js
import { debounce } from "@/utils";
const ctxChange = debounce((key: "title" | "content") => {
  if (form.value.status && form.value.status == 1) return;
  if (loading.value) return;
  if (mode.value == "create" && form.value[key]) {
    loading.value = true;
    artstore.createArt(form.value, (res) => {
      mode.value = res._id;
      router.push({ params: { tag: res._id } });
      loading.value = false;
    });
  }
  if (mode.value != "create") {
    loading.value = true;
    artstore.updateArt(mode.value, form.value, () => {
      loading.value = false;
    });
  }
}, 3000);
上方代码中,自动保存函数被限制为最多 3 秒执行一次。首次自动保存执行创建文章逻辑,之后的保存执行更新文章逻辑。
(8)编写发布弹出框的样式代码,如下:
less
.art-publish-popover {
  padding: 0px !important;
  .p-title {
    font-size: 17px;
    padding: 16px 20px;
    font-weight: 600;
    color: var(--font-color1);
    border-bottom: 1px solid #eee;
  }
  .el-form {
    padding: 20px 20px 0 0;
    .cate-item {
      width: 88px;
      height: 28px;
      background: var(--bg-color1);
      &.active {
        color: var(--el-color-primary);
        background: var(--bg-color2);
      }
    }
  }
  .p-footer {
    padding: 16px 20px;
    text-align: right;
    border-top: 1px solid #eee;
  }
}
最终发布弹出框的界面如图所示: